Part Five
Now that we have covered the different styles of spearfishing videography gun mount, head mount, handheld and bigger cameras, I am now going to move onto what to film and when to film it.
The whole reason for taking your footage from good to great is so you can edit it all down and then share it with friends and family, and of course for you to relive the awesome events that took place in the most real and authentic way.
This article should help you with regards to how to film for a great edit. ITZ has worked hard over the years to develop a story format in our edits. As I have said before, there are just too many spearfishing music videos out there and to be dead honest, I normally click off these videos after about 1 minute in. I just find this style so boring that I am not even prepared to wait and see if there are some great shots in the mix of many of the average or even badly filmed scenes.
Before I start, let’s first cover some film theory so you have a deeper understanding of why I am suggesting certain scenes need to be filmed at specific moments in the dive.
What to film and when to film it:
The most important thing to remember here is that I am attempting to not only help you take your footage from good to great, but also your spearfishing editing and storytelling. There are many different styles of editing, but I am going to share with you the winning recipe In The Zone Spearfishing has adopted over the years. I am very pro a storytelling style, rather than the more commonly used music and clips randomly mixed together with no story. The only person I have seen pull this style off with excellence is Perrin James, but his footage is shot with top end DSLR’s and is amazing. Perrin is also an artist when it comes to filming and editing, so his music and imagery work almost poetically together, giving the viewer at real sense of awe throughout.
ITZ, as I have mentioned, leans towards a very different editing style. We like to tell a story and take the viewer on the journey with us. We do this in a very intentional way.
- By taking the time to film all the extra B-Roll footage you’ll need besides just the money shot, this is so that you can get a feeling of the actual day and experience the journey with us.
- We use voice commentary to verbally tell/share the adventure with you.
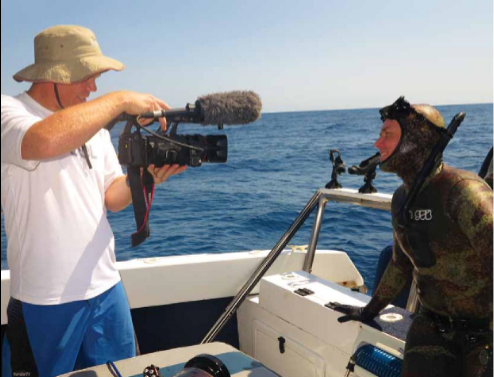
- We use filmed interviews so that you can see and connect with the person telling the story.
- Last but not least, we work hard on our sound so that there is a good mix between the real life sounds, voice commentary and music. This helps convey the emotion of the moment.
The reason why you need to go through all this effort is to tell the story in a way that your audience can relate to. The real skill comes in when you do this in a way that shortens the time frame that the real life events took place in. For example, we will often cover a whole days diving or even a whole dive trip in just 7 minutes, (most of our YouTube videos on ITZTV are between 5 – 7 minutes long) I don’t think people these days have the time or patience to sit and watch a video online that is longer than 7 minutes.
Okay, so now that I have covered some basic theory let’s get into the nitty gritty of what to film and when to film it. Remember what I said earlier, we are trying to tell the story of the days diving that, in a way, fast tracks the story but does not cut the viewer short in sharing the adventure.
Let me pause here quickly and run a very quick recap on my first article. Our formula is actually quite simple, but not easy. That’s why I said in my first article, to get great spearfishing footage you have to be very passionate about spearfishing cinematography, because at some point you are going to have to sacrifice hunting fish for filming.
Okay, so back to what to film when. Basically, you want to tell the story of the day in a much shorter way than the real time events took to live out. Remember you only have max 7 minutes (for a YouTube vid) to share the whole day or trip.
So how and when do you start?
It’s as simple as looking at what actually happens when you go diving. I am now going to list the shots, but it’s not always necessary to put all of them into every vid. Sometimes, it’s more beneficial to start earlier or later on in the chronological order of when each event took place. We normally only go all out to include shots 1-20 when we are filming a movie. For YouTube, we normally start later on in the journey and try to get to the action much quicker. Even with a YouTube vid, like any good story, there must be a build-up and then a climax. The art in this is to keep the viewer on edge right up until the climax.
Not all of the below points will apply to you, you might have more, you might have less or you might have a variation in what you do.
Nevertheless, focus more on the principle of each shot I have listed rather than the actual details.
- Pack the car
- Drive to the launch site
- Get ready to dive
- Launch the boat
- Drive to your dive spot
- Get ready on the boat to dive
- Sit on the side of the boat and jump in
- Load up your gun
- Breathe up
- Dive down
- Settle on the reef or in mid water
- You see a fish coming in
- You line up and shoot
- Head for the surface while the fish screams off
- Fight the fish
- Land the fish
- Display the fish
- Boat the fish
- Display the fish on the boat
- Jump back in and start all over again
I’m sure most of you did not imagine I was going to come up with 20 different shots in a full story of the day’s events, but most spearfishing videos today show head mounted shots and hardly anything else. I totally understand that most guys just don’t have the time or patience to film all 20 shots, so let me help you prioritise the ones that simply have to be there.
- Drive out to your dive spot – Just a quick clip of you and your mates on your way out to your dive spot
- Sit on the side of the boat and then jump in. You can self-film this or just ask a mate to film you jumping in.
- Dive down – If it’s just you filming, turn the camera so that we can see you and then on the next dive point the camera down the barrel so you can compile the 2 angles together in the edit.
- You see a fish coming in
- You line up and shoot
- Head for the surface while the fish screams off.
These 3 shots are the most common scenes found on YouTube. ITZ does not represent a fish been taken unless the gun shot is well captured on camera.
- Fight the fish
- Land the fish
Again these shots are often self-filmed. It makes a huge difference if you get a mate to film these shots, but often it’s not possible as you’re all alone and your mates are too busy hunting to bother with filming.
- Display the fish for all to see
This has to be one of the most important shots and often the ITZTV climax to our videos. I don’t believe the self-filmed version of this very important angle achieves the finalisation of your catch. It’s so important for the viewer to feel the joy by seeing you with your catch in your hands and the stoke it brings you to achieve the catch.
So if you get the minimum of shots 10 and 12-17 you should have enough content to put together a super cool short video that actually takes the viewer on a journey rather than the common randomly put together collage of shots and scenes.
In my next article, I’ll go into more detail on the different ways you can film shots 1–20 and how you can piece them together to take your spearfishing video editing from good to great.
